
This article takes a more detailed look at the process for a 2.5 gallon stovetop BIAB brewing. First, I start with an overview of recipe formulation and take a quick look at water chemistry before digging into the process of converting grains into wort and fermenting that into beer. Along the way, I mix in a little information about my process and equipment.
I won’t be able to teach you everything about brewing a beer in one article, but hopefully this one will give you some practical advice on how you can get started. Be sure to check out the first two articles in this series:
And also be sure to check out my video walkthrough where I put the equipment and process to work to make some beer.
Note that much of this article describes my stovetop BIAB process using my equipment. This is the general flow that I recommend, but it will likely not fit you exactly. Adapt the process to fit your equipment and preferences.
Recipe Formulation
Brewing starts with a plan (a.k.a. a recipe). Finding, tweaking and creating recipes are topics for future articles. The important points for now are 1) you will likely not find many published recipes for 2.5 gallon batches, and 2) it is simple to adapt 5 gallon recipes by dividing all the ingredient amounts in half.
Note that “5 gallon” recipes are written for a variety of fermenter target volumes; often for 5.0 or 5.5 gallons into the fermenter, but sometimes as high as 6.0 gallons. All-grain recipes are also written with an underlying brewhouse/overall efficiency target. This is often in the 70% to 75%. Water volumes described in recipes can also be specific to the losses and boil off rates of the brewer’s process.
Ideally one would understand the variables of their process and equipment, then adapt recipes to hit target volumes and gravities. This is usually done using brewing software. Without brewing on your equipment, you will just have to start with an estimate. As you brew, take measurements and adjust for the future. I base my recipes around a 70% overall efficiency and a 0.7 gal per hour boil off rate. See below for a discussion of grain milling, but for a standard grain crush an efficiency of 65% might be a better starting place.
I use a grain absorption value of 0.06875 gal/lb. Well, actually I use a value of “0.55 fl oz/oz” which are the units that BeerSmith uses for whatever reason. 0.06 or 0.07 gal/lb are decent starting numbers. I have tuned my overall efficiency and grain absorption toward easy to hit numbers that do not involve excessive work to squeeze out every last drop of wort from the grain.
To get started, I would advocate starting with a well regarded 5 gallon recipe and dividing all the ingredients in half. For water volume, I recommend you start with 3.9 gallons of strike water (this is the amount of water before adding the grains).
I also recommend that you take some measurements along the way so you can better understand the efficiency, boil off rate, and volume losses of your system and process. With that knowledge, you can use brewing software to tailor ingredient and water volumes.
Example 2.5 Gallon Recipe for Stovetop BIAB
Below is an example recipe for an easy to brew batch based on a Pale Ale recipe that has been a favorite brew of mine for many years. I include it here mostly to provide a frame of reference for a recipe, but feel free to brew it as written or after tweaking it for your preferences.
Ingredients
- 4.5 lbs (90%) Pale Malt
- 0.5 lbs (10%) Crystal 40
- 0.2 oz Columbus (26 IBU) – Boil 60 min
- 0.5 oz Cascade (13 IBU) – Boil 20 min
- 0.5 oz Cascade (4 IBU) – Flameout
- 0.5 oz Cascade – Dry Hop 3-4 days before packaging
- 1 g Irish Moss – Boil (10 min)
- American Ale Yeast (Chico/WLP001/WY1056/US-05)
Process and Numbers
- Strike Water: 3.9 gal at 157F; Mash at 152 F for 60 min
- Pre-Boil: 3.5 gal at 1.037; Post-Boil: 2.8 gal at 1.049
- Fermenter Volume: 2.6 gal; Ferment 65F to 68F for about 14 days
- OG: 1.049; FG: 1.012; ABV: 4.8%; IBU: 43; SRM: 7.4
Water Chemistry
I almost hate to include this section, but water chemistry is worth a quick mention. Water is important to extract brewing, but it is more important to all-grain brewing. There are entire books written about brewing water chemistry, so this will just scratch the surface.
One thought on water: “if your tap water tastes good, it will make good beer.” That is the easiest place to start and a pretty good idea if you are new to all-grain brewing. Most municipal water is treated with chlorine and/or chloramine, so you should add 1/2 of a campden tablet to address that problem. So if you don’t want to mess with water adjustments now, feel free to skip ahead. I brewed for many years using Virginia tap water treated for chloramine.
If you are not starting with quality tap water, or if you know your home water source is very hard or has high levels certain minerals, you might want to start with a neutral source. Also, water treated with a water softener will often have very high levels of Sodium and may not be suitable for brewing.
Many stores sell distilled, reverse osmosis (RO), or spring water, either in 5 gallon jugs, 1 gallon jugs, or refillable containers. Distilled and RO are mostly blank slates. The mineral contents of spring water varies, but is also generally low. If going this route, you might want to read up on some simple water chemistry adjustments to add back the minerals that are desirable and beneficial to brewing (such as Calcium, Sulfate, and Chloride).
My Water Chemistry Process
To start, I had a water analysis done by Wards Lab. I use that as a basis but I also understand that my mineral levels vary through the year. I have invested effort into understanding target water profiles, but most software will have some basic targets. These days, I use a mix of Bru’n Water and BeerSmith Mobile to calculate my needed salt additions and pH adjustments. Gypsum (Calcium Sulfate) and Calcium Chloride are my most common additions, with Epsom Salt (Magnesium Sulfate) sometimes added.
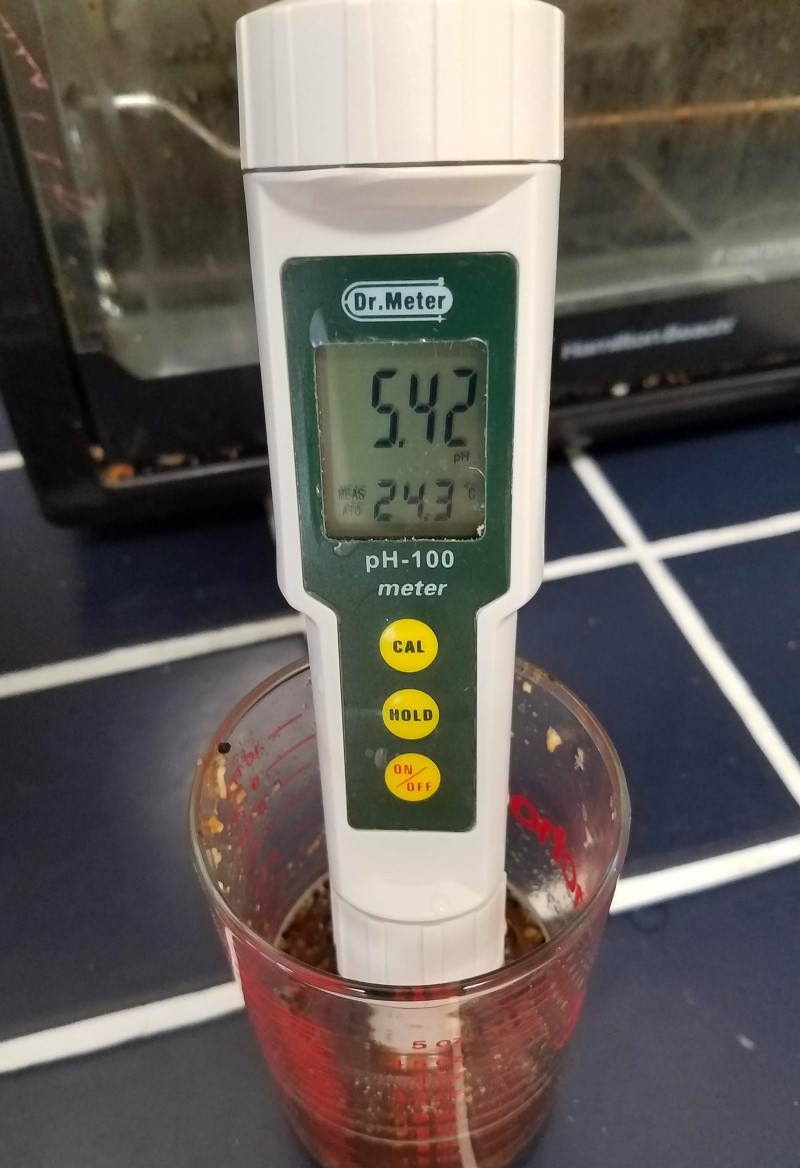
I have an inexpensive pH meter (Dr. Meter PH100) that has worked well enough for my needs. With my tap water I will have to add acid for my lighter colored beers; I use 10% Phosphoric Acid but have also used Acidulated Malt. Most amber and moderately dark beers fall into a good pH, and I only occasionally have needed to raise my pH for beers with over 15% roasted malts. For these cases I have used Baking Soda (Sodium Bicarbonate). My tap water has enough Sodium, so I do not regularly add any and I have not noticed where adding Baking Soda has pushed it too high.
Hopefully this discussion has not scared you off from all-grain brewing. When I started I often used bottled water with minimal adjustments. For many years I have lived in locations with decent tap water, and I brewed with straight tap water treated with a campden tablet. I have only been adjusting mineral levels and pH since 2019. It has made an improvement, more noticeable in some styles, but I made solid beers with my unadjusted tap water.
Grain Crush for BIAB
The first step on brew day is often to measure and crush grains. Note, that I have seen forum posts from people that brewed with un-crushed grains. Don’t be that guy!
Note, I actually get my strike water measured, adjusted and heating first thing. I then work on measuring and crushing my grains while the water heats. Some people crush their grains the evening prior.
If you purchased pre-crushed grains, you are almost ready to jump to the next section. Keep in mind that a fine crush is beneficial to BIAB brewing. The typical sparge or recirculation system needs a more coarse crush to avoid a stuck grain bed, and this coarse crush is generally the standard mill setting for shops and mail order vendors. There are also some mail order vendors that are notorious for a very inconsistent or coarse crush.
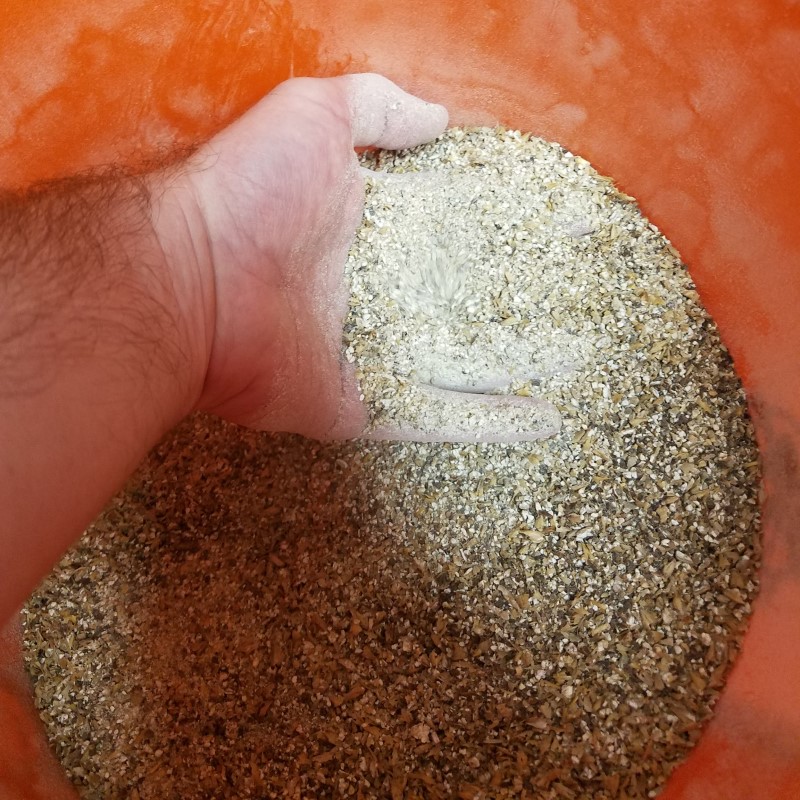
With BIAB brewing, there is no real worry about a stuck grain bed. A fine crush will have a significant improvement to efficiency bringing BIAB on par with other all-grain systems. It is very common to see reports of low gravity BIAB beers resulting from low efficiency driven by coarsely crushed grain.
Some local shops and mail order vendors will provide the ability to adjust the mill gap, to specify a finer crush or to double crush your grain. Double crushing involves sending the grain through the mill twice, but at the same gap size. This should help some, but is not as consistent as setting the mill gap. If you do not have your own mill, I recommend that you seek out a store that will provide fine crushed grain to avoid frustration with low efficiencies.
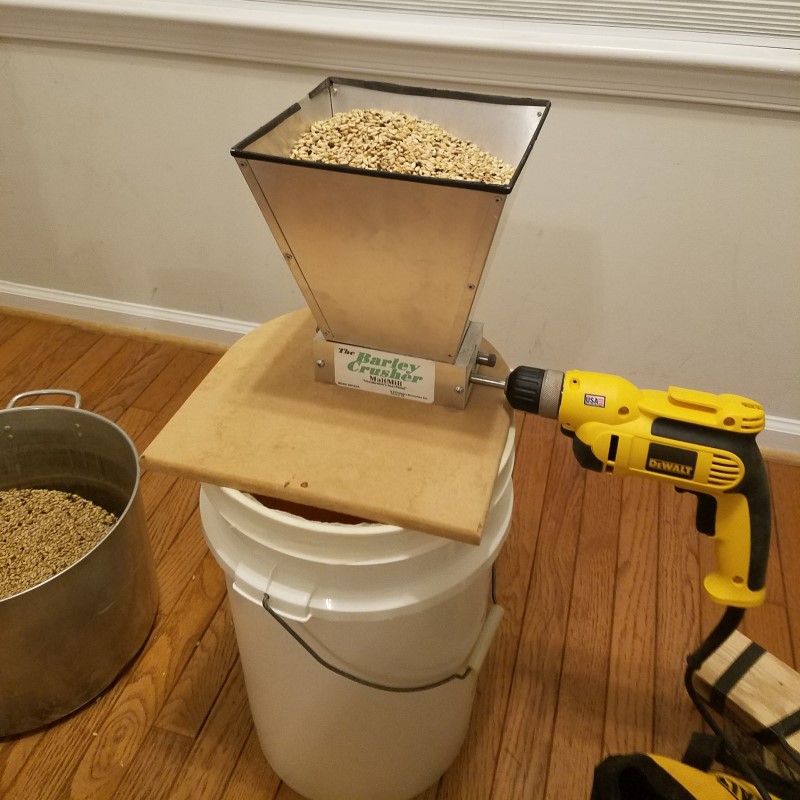
I advocate that all-grain brewers think about purchasing a grain mill. You should be able to find a decent quality grain mill in the $100 to $150 range. This will give you complete control over your grain crush. It also open up more options for purchasing bulk grain or keeping specialty grains in stock. I have had good luck with my “American Made” Barley Crusher, but there are less expensive options.
Mashing
Okay, now we are finally making beer!! Or at least making wort. There are lots of different systems and processes that brewers use to conduct the mash, but BIAB is just about as simple as it gets. At its core, a mash involves mixing water and crushed grain together and holding it at a temperature where enzymes are active to convert the starches in the grains into fermentable sugars.
How much water?
Note that with full volume mashing, the entire volume of water used is added in with the mash. The amount of water needed is a formula based on the target volume in the fermenter plus water and wort losses through the process. In this method, the main losses are grain absorption, boil off, and trub left in the kettle.

There are various calculators that can be used to determine the amount of water needed. They require either measurements from your process or make an educated guess. Your recipe impacts the water needs as more grain and more hops will absorb more water.
If in doubt, I suggest you start with 3.9 gallons of strike water. This assumes a batch with around 5 lbs of grain. Worst case is you end up with too much or too little beer in the fermenter. You can then adjust your strike water in the future based on your brew notes.
What mash temp?
Brewers often worry about precise mash temps and holding the mash at a specific temperature through the mash. While wide ranges in mash temperature will have measurable impact on the fermentability of the beer, small differences have very little impact on the character of the finished beer. It is not critical to hold a precise mash temp through the entire mash. Mash temperatures are generally in the 148F to 156F range, with a mash temperature around 152F being a good general target.
With single infusing mashing, you heat the strike water to a temperature above your target mash temperature. When you add the colder grains to the water, it will lower the mixture down to your target mash temperature. I use software to calculate this. If in doubt, start off with strike water around 157F. This should get you close to the 152F mash water, assuming your grain is at a reasonable room temperature.
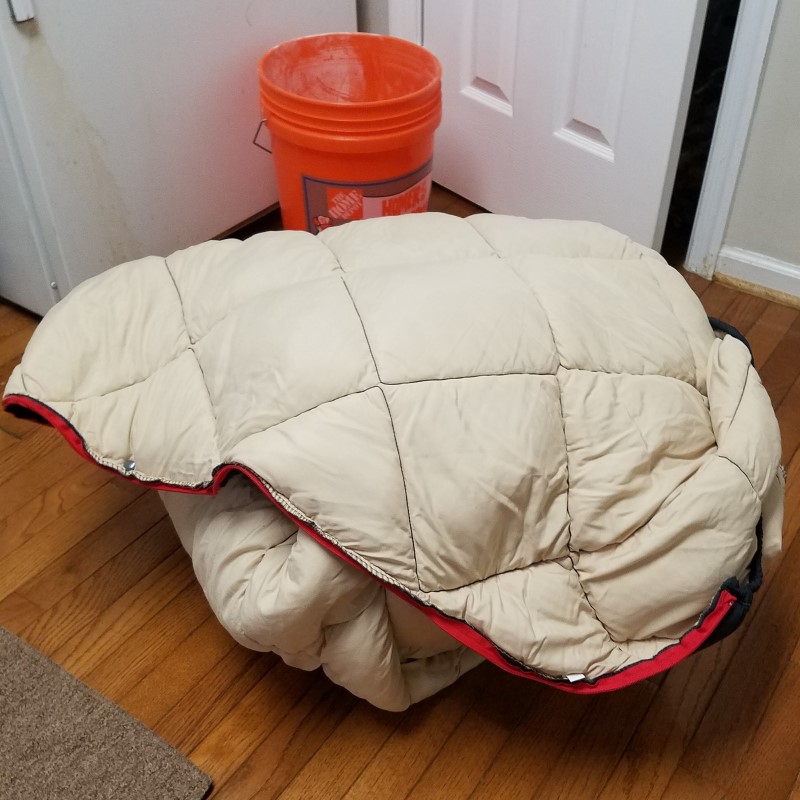
With the smaller volume of a 2.5 gallon batch, some insulation during the mash is beneficial. This can easily be achieved with an old blanket, comforter or sleeping bag. I find insulating the pot during the mash is much easier than trying to apply heat. If I start my mash at 153F, wrap it in a blanket, I will likely end the mash at around 150F. I doubt there is much impact of an even lower temperature drop. Most conversion happens in the first 20 to 30 minutes of the mash. In general, my goal is to keep the mash temp within 4F of the target mash.
How long to mash?
60 minutes is my standard mash duration and what I recommend. My understanding is that I could stop at 30 minutes with the only real impact being the loss of a few points of efficiency. In my view, the mash is just sitting there not needing attention or consuming energy, so I will often fix breakfast or do something else around the house. I don’t see much need to shorten down the mash time myself.
I will usually stir the mash well when adding the grain. Around 30 minutes in, I will open up the kettle and give it another stir while grabbing a sample for a pH reading. Taking a pH reading is option, but I recommend a good stir at 30 minutes. At 60 minutes I give it another good stir and check my final mash temp.
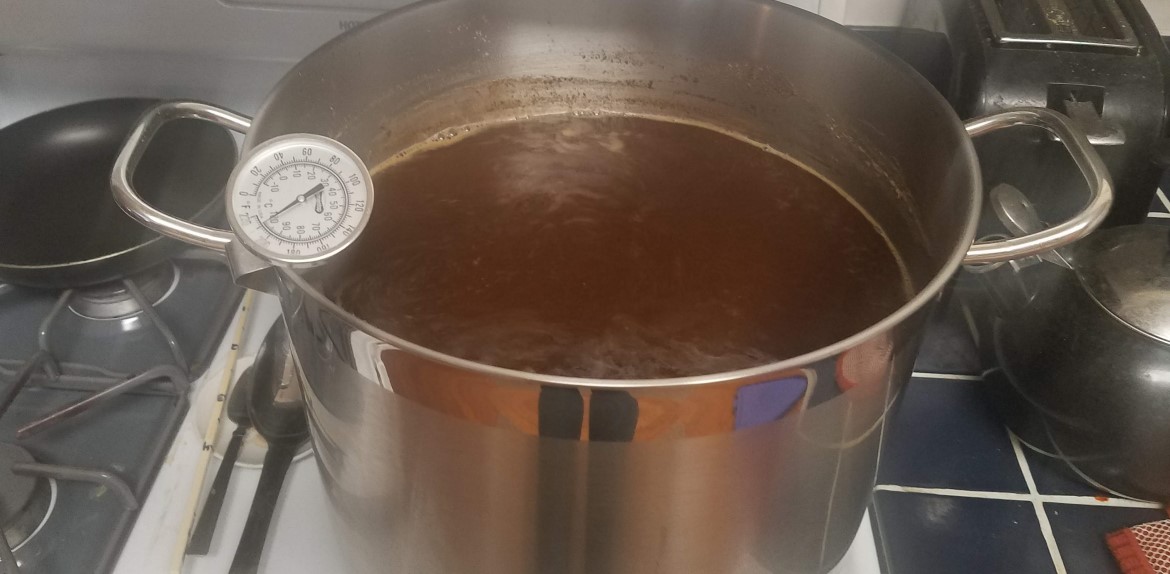
Bag Removal and Draining
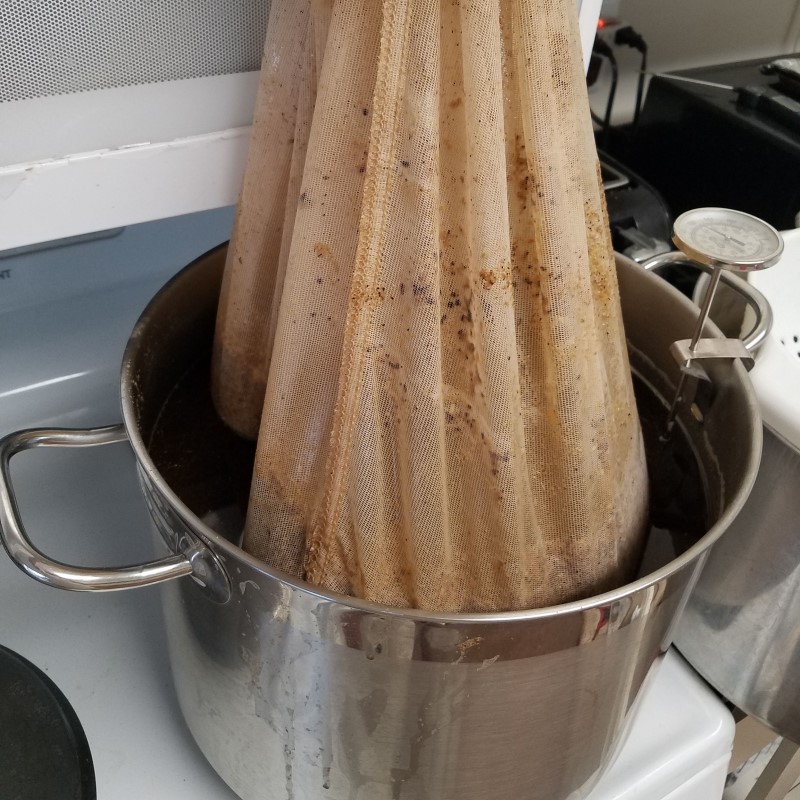
After the mash is complete, you should have pot full off warm, sweet, sticky wort. During the mash, the enzymes have converted starches in the grains into sugars. The next step is to separate the grains from the water. Luckily, the brew bag makes this easy!
The process that I have found works well for draining my brew bag is slightly different than what is shown in these pictures. I had a few issues with wort dripping down the side of the pot or down my cabinets. I found that I can move the kettle to one side of my kitchen sink, and place the bucket/strainer assembly in the other side. Then it is not a problem if I drip a little while moving the bag.
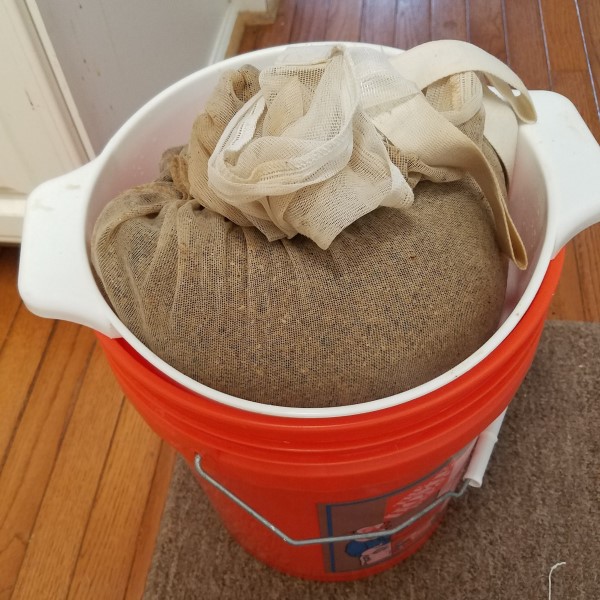
So I just lift out the brew bag slowly, let it drain for a minute, then place it in the strainer. The bag will drain into the bucket while I start to heat the wort. At this point I will check how much volume I have and check the gravity of the wort using a refractometer. I can adjust a little if needed. Most commonly this is done by squeezing out more liquid from the bag, or maybe sparging with a little hot tap water.
The exact setup here is not critical. I happened to have this strainer that fit fit nicely over a bucket, so I use that. You might have another way to hang the bag or to hold the bag to drain.
Boiling and Additions
The recipe included above shows my target post-mash/pre-boil volume of 3.5 gallons. That gives me 1.5 gallons of headspace, which is enough to tamp down most boil over concerns. Though I do recommend you keep an eye on your wort as it nears boiling temps.

The 3.5 gallon volume comes from: 2.6 gallons chilled wort into the fermenter + 0.7 gallons boiled off in 1 hour + 0.2 gallons to account for shrinkage due to temperature and trub left behind in the kettle. Your values may vary a bit.
There is not a lot about boiling that is specific to 2.5 gallon batches or BIAB. You will usually add some hops at the start of the boil or a little before), add some more hops during the boil, add other ingredients like Irish moss/Whirlfloc, spices, sugars, etc. based on your recipe.
You want to sustain the boil at a gentle boil state. Many opinions these days are that a vigorous boil is not needed. For me, my gas burner on full will keep my wort at a nice gentle boil. The boil will put off 0.5 to 1 gallon of steam into your house. This is not an issue for me in the winter where some warmth and moisture is a welcome addition, but I definitely keep my stove vent running on high during the summer. Keep an eye for any steam build up on cabinets above your stove and adjust as needed.
Chilling
The next step in the process is to chill your boiling wort down to a temperature range suited for your yeast. For most ale yeasts, a target temperature of 65F is ideal.
Ice Bath Chilling
If have found that 2 gallon batches cool quickly in a kitchen ice bath, 2.5 gallons a bit less quick, and 3 gallons batches start to require more time and work than I prefer. Tips I would have for chilling your wort in an ice bath are:
- Remember that sanitization starts to become critical once your wort drop below around 180F. Be sure to only used cleaned and sanitized equipment with cooled wort, and avoid dropping items or splashing items into your kettle.
- If using ice, I generally like to do one cooling cycle with just cold tap water. Even if your tap water is not very cold, the temperature differential will suck a lot of heat out of your kettle. Once the tap water warms up, drain it out and start with fresh cold tap. This will reduce the amount of ice that you will need to use vs melting all your ice with a 200F kettle.
- I find it best to use two spoons, one for the tap water/ice and one for the wort. Any old spoon (or a turner) can be used to stir around the outside tap water and ice. Use only a clean and sanitized spoon for stirring the wort, being sure to reclean and sanitize between uses. Another option is to just let your wort sit in the covered kettle, checking on it once and a while.
Immersion Chiller
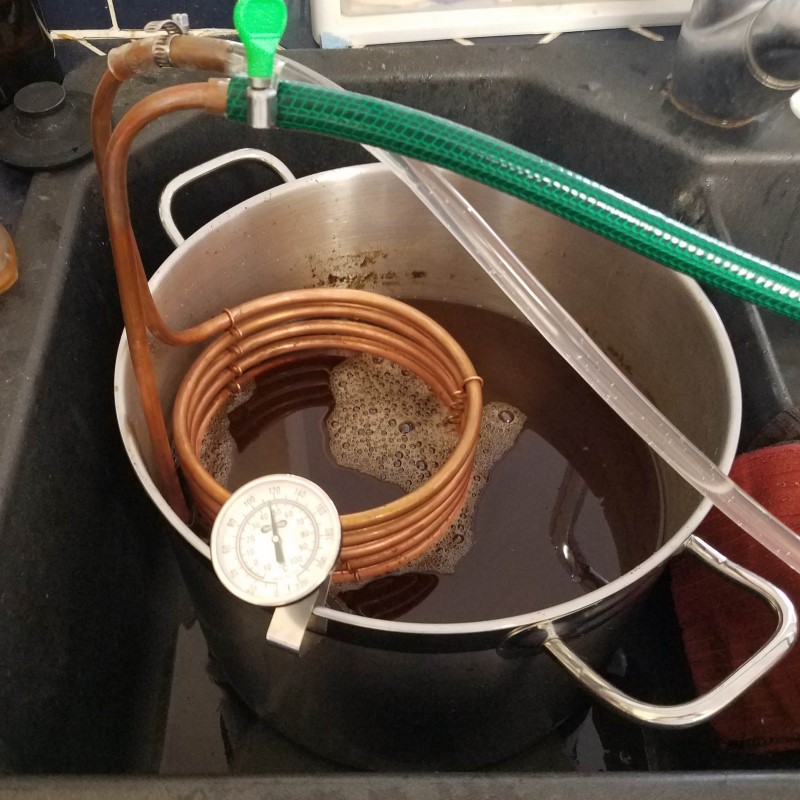
I typically use my immersion chiller. If you don’t have one, you might think about upgrading after a few batches. I have my original DIY immersion chiller made with a 20 or 25 ft. length of copper pipe. At some point I acquired a commercial 25 ft. immersion chiller. I will use them both in combo for a 5 gallon batch, but just one of them is plenty for a 2.5 gallon batch.
During the summer/fall months, when my tap water is around 70F, I may need to use an ice bath to get my wort down to pitching temps. A fermentation chamber or cool basement could also be used to knock off that last 10F.
Sanitization
I won’t go into depth here, but once the wort temperature drops below 180F, every item that touches the wort should be cleaned and sanitized. StarSan is the sanitizer I use. Sanitization is a key aspect of making good beer. I have a gallon or two in a bucket and a spray bottle.
I believe that cleaning is 90% of the sanitization challenge. This means giving all your equipment a good cleaning shortly after use. I also recommend using equipment dedicated to brewing. Don’t take a sample with your kitchen turkey baster or stir cooled wort with an old plastic spoon.
Pitching Yeast & Fermenting
Once the wort is chilled down, it is time to transfer it into the sanitized fermenter. I have tried out different methods, but my go-to method these days is to pour the wort through a funnel and a mesh strainer. The liquid for a 2.5 gallon batch is much easier to lift and pour than a 5 gallon batch.
I have not mentioned a yeast starter yet. The good news is that with a 2.5 gallon batch, that single packet from White Labs or Wyeast is just about the right pitch rate for a moderate gravity beer (say 1.060 or less). A dry yeast pack might be more than is needed, but I have never encountered any issues with pitching a full pack of Fermentis dry yeast into a 2.5 gallon batch. Feel free to pitch just half a pack if that suits your style.
If you have a temperature controlled fermentation chamber with a preferred fermentation schedule, follow that. If not, and assuming you are using a standard American or English/UK style ale strain, then you will produce better beer fermenting in a cool (around 65F) location where the temperature is stable. Different strains of yeast may produce better beers at different temps (say lager yeasts at 50F or Belgian yeast at 75F). There is also Kveik yeast, which seems to break all the rules.
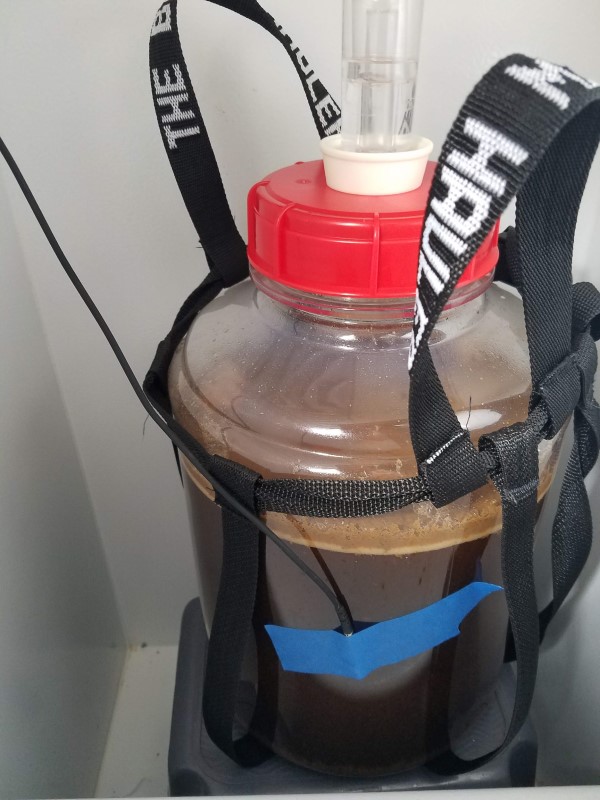
Fermentation process and temperature are beyond the scope of this writing, but I find that 2.5 gallon batches have a few advantages. They have enough heat mass that they will not swing wildly. The smaller vessel dissipates heat generated during fermentation better than larger batches. The fermenter might be too large to stick next to your milk in the family fridge, but it is small enough to fit in a small refrigerator.
Packaging
So you have given your beer time to ferment, usually around 2 weeks, and it is time to package! The two main options here are bottling or kegging.
Bottling
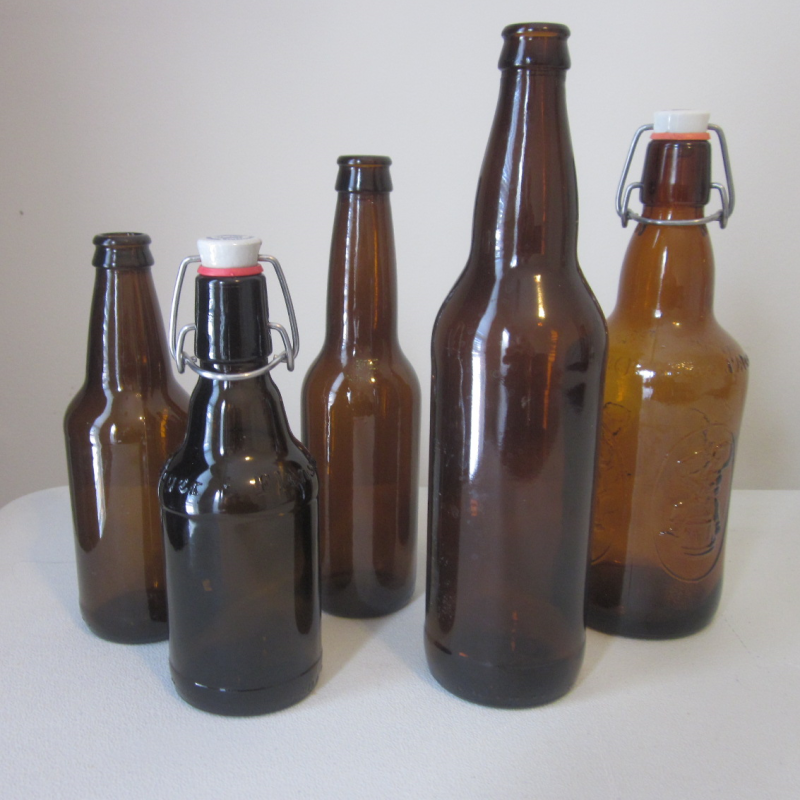
The costs of equipment and supplies for bottling are minimal. Most people will clean and reuse commercial beer bottles, though you can purchase new bottles. I recommend using either pry off cap bottles or swing top bottles. Bottles of various sizes such as 12 oz, 22 oz, 0.3L, or 0.5L, all work fine if you are batch priming.
To provide carbonation to bottled homebrew, sugar is added to the beer. This sugar is consumed by the yeast still in the beer to produce CO2, and a small amount of alcohol. There are various calculators available, and I recommend you find one that you like and that you tweak the amount of sugar based on the actual volume of beer and the style that you are bottling. This will give better results than always adding a fixed amount of sugar to every batch. Corn sugar or table sugar are common sugars used.
The most common method for adding sugar is called batch priming. The beer is transferred to a botting bucket, and a measured amount of sugar is added to the beer. Usual practice is to dissolve the sugar in a small amount of boiling water, and stir the mixture well into the beer.
Another method, which I have done often, is to add sugar directly to each bottle. Commercial “carbonation drops” are available where you add 1 candy-like piece to each 12 oz bottle or maybe several 3 to 4 smaller pill-like pieces. These drops are a bit expensive for my tastes. An alterative that I have used are Domino Dots sugar cubes. One cube provides a good carbonation level for a 12 oz bottle or 2 for a 22 oz bottle. A downside of this approach is that you don’t have as much flexibility over the size of bottle used or the level of carbonation. Adding measured sugar amounts to each bottle is also an option, though one I do not have experience with.
Once your beer is bottled, it is best to leave it in a warm-ish (70F to 75F) area for about 2 weeks to fully carbonate. Some batches will carbonated faster, and some, like high ABV beers, may take longer.
I notice I could not find a picture related to bottling in my picture albums. I suspect that is because I don’t bottle very often but mostly because bottling already requires 3 hands making it a bit hard to document.
Kegging
I am a fan of kegging beer. I enjoy the control over carbonation level, I appreciate the ability to limit oxygen exposure, it speeds up the time to start drinking my creation, and it is much easier to clean one keg than a case of bottles.
That said, I know that kegging is an expensive option. Well, depending on your definition of expensive and what you want in a kegging setup. You can get a kit (tank, regulator, used 5 gal keg, picnic taps, and misc) for around $200. Looking around, I see a kit with a new 2.5 gallon keg for $260. I purchased a pair of the Torpedo 10L/2.6 gallon kegs and the $170 price tag was hard to justify, though I do enjoy the kegs.
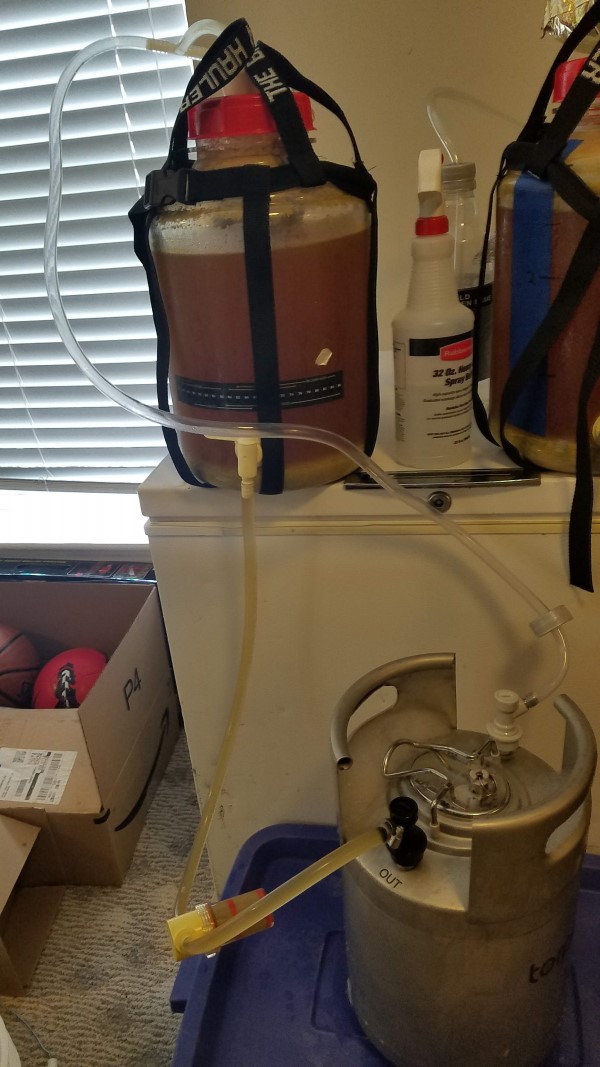
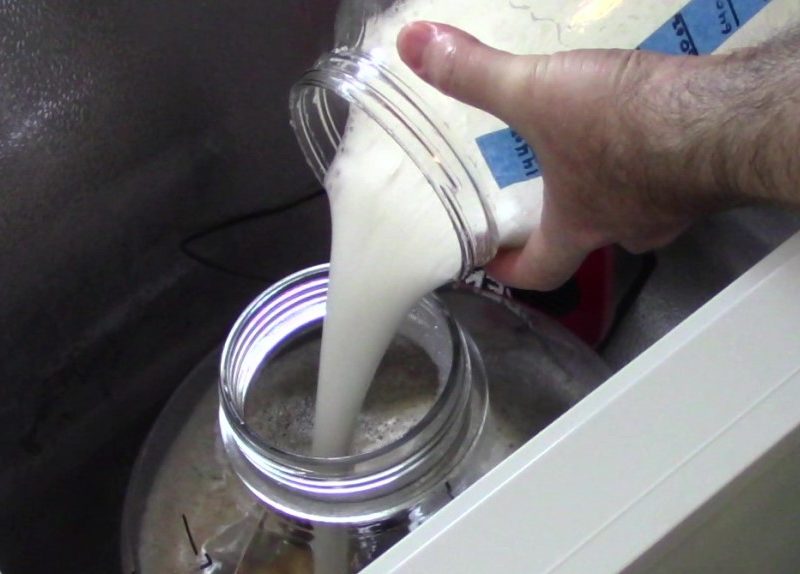
I will not go into detail on kegging and carbonation here, but I included a picture of me doing a closed transfer from my 3 gallon Fermonster.
Stovetop BIAB Process Recap
Ok, I included a lot of stuff in this article. Get in there and brew a few batches. You will find that it is not that hard. Just to summarize what I said above:
- Find a Recipe: Track down a simple, mid-gravity all-grain recipe to get started. If starting with a 5 gallon recipe, just divide all the ingredients in half.
- Water Chemistry, Maybe: I included some info about water chemistry because it can be important. For most people, tap water treated to remove chlorine and chloramine is a good starting place.
- Measure and Mill Grain: Three milling options are: mill at home, mill at store, or purchase pre-milled. Measure out the grains needed for your recipe.
- Prep and Heat Strike Water: Calculate the needed volume and temp, or jump in with 3.9 gallons of water heated to 157F. Tip: you might want to get the water heating while you measure and mill your grain.
- Conduct Mash: Again, exact temperatures are not that critical. Your goal is starting the mash in the 150F to 154F range. Wrap it up and let it mash for 60 minutes. Be sure to stir well at the start, at 30 minutes and at 60 minutes.
- Drain Bag: The exact process here is not critical, but find a flow that works for you. Sticky wort all over your stove and kitchen floors is not a good thing. I don’t enjoy squeezing a hot and sticky brew bag, so I try to use gravity and time to let the liquid drain.
- Boil Wort: A gentle boil is ideal. A 60 minute boil is pretty standard.
- Boil Additions: During the boil add in needed items at the specified times. This includes items like hops, sugars, clarifiers, spices, and flavorings.
- Chill Wort: Either in an ice bath or using an immersion chiller (or both) get your wort down to pitching temps. For most yeasts, this is closer to 65F than 70F.
- Sanitization: Only let clean an sanitized equipment touch your cooled wort!
- Transfer to Fermenter & Pitch Yeast: Time to get your cooled wort into the fermenter and pitch your yeast. The process will vary some based on your equipment. Pour in your yeast once the wort is in the fermenter.
- Ferment: Most ale yeasts produce the best beer at temps between 65F and 70F. Keep in mind that fermentation produces heat, so 70F ambient might mean 75F temps in the fermenter.
- Package: Time to bottle or keg your beer. Bottled beer should be stored for about 2 weeks at temps near 70F to carbonate, then chilled in a fridge before drinking. Kegged beer will take a week or so to settle and carbonate.
- Enjoy!! Finally, it is time to enjoy the fruits of your labor. Be sure to share some of your brews with friends.
- Repeat: If you have not started already, get yourself back up to step #1 and get another batch going!
This is the best explanation of the process that I’ve ever read. Well done! Found this during a search and it answered my question, and a few I’d never thought to ask.
I am glad you enjoyed the article. I am a big fan of mid-sized batches, and it is usually a lot easier for me to fit in a smaller batch on my stove than outside with my propane burner.
awesome write-up